Create "Walls" for Your Exhibitor Space
Create “Walls” in Your Space
All indoor and outdoor exhibitors at Craft Lake City events are required to bring a “back wall” (with 20lb weights to secure each side) to create a small “shop” for their brand. This wall should be no taller than 10 feet, and no wider than the allocated exhibitor space size as designated in your acceptance email. Side walls are not required. Below are some ideas for ways to make your exhibitor space feel like a welcoming experience for shoppers!
Wire racks are a fabulous option that offer a lot of wall space to display prints, paintings or other lightweight 2D work. (Pictured: Furturtle)
Creating a back wall for your space:
Walls will not be provided by CLC, but every exhibitor is REQUIRED to bring one back wall with weights to physically separate them from their neighbor, and to help their space feel like a small store. Many exhibitors will be placed back-to-back to one another, and your “back wall” will help to clearly define your space (while hiding the “wrong” side of the other exhibitor’s wall). Some exhibitors will be placed up against a wall (with no one behind them), and in this case the required back wall helps to make your spot feel like a pop-up shop (while providing you with lots of additional room for signage, branding, decor, etc.). Walls may not exceed 10 feet in height in order to comply with fire code at the Utah State Fairpark. The back wall structure should span most of the width of your space (10 feet), but the wall, base, hardware and weights should never extend beyond the limits of your designated floor area. Regardless of whether you opt for placement indoors or outdoors, your back wall structure will need to be secured with 20 lb weights on each leg/side to ensure that it doesn’t fall or get pushed down (which provides a safety concern for festival goers and exhibitor merchandise). Weights can be as simple as water jugs or sandbags.
* It is strongly recommended that exhibitors consider making their walls as lightweight and portable as possible, to make your job easier during load-in and load-out! *
This is a great example of a lightweight option for your back wall: a photo backdrop frame with curtains! (Pictured: The Basil Project)
There are many options for creating walls, so feel free to get creative! Here are a few ideas:
- Photo backdrop with fabric or material – these are often adjustable! (Example purchase listing)
- Wire racks
- Pegboard
- Shelving or furniture
- Custom DIY walls made of wood or other materials
- Pipe and drape (can be rented locally from Diamond Rental or can be a DIY project)
Please note that indoor exhibitors in 10’x10′ spaces at Craft Lake City events ARE permitted to use metal tent frames (up to 10′ tall), however fabric or material on the top of the tent are NOT allowed due to fire code. Outdoor exhibitors in 10’x10′ spaces at Craft Lake City events are required to bring a tent with “roof” fabric & 40 lb. weights to secure each tent leg.
This zip-tie + metal loop piece is a clever solution for affixing a weight to a large wall that doesn’t have a “leg”!
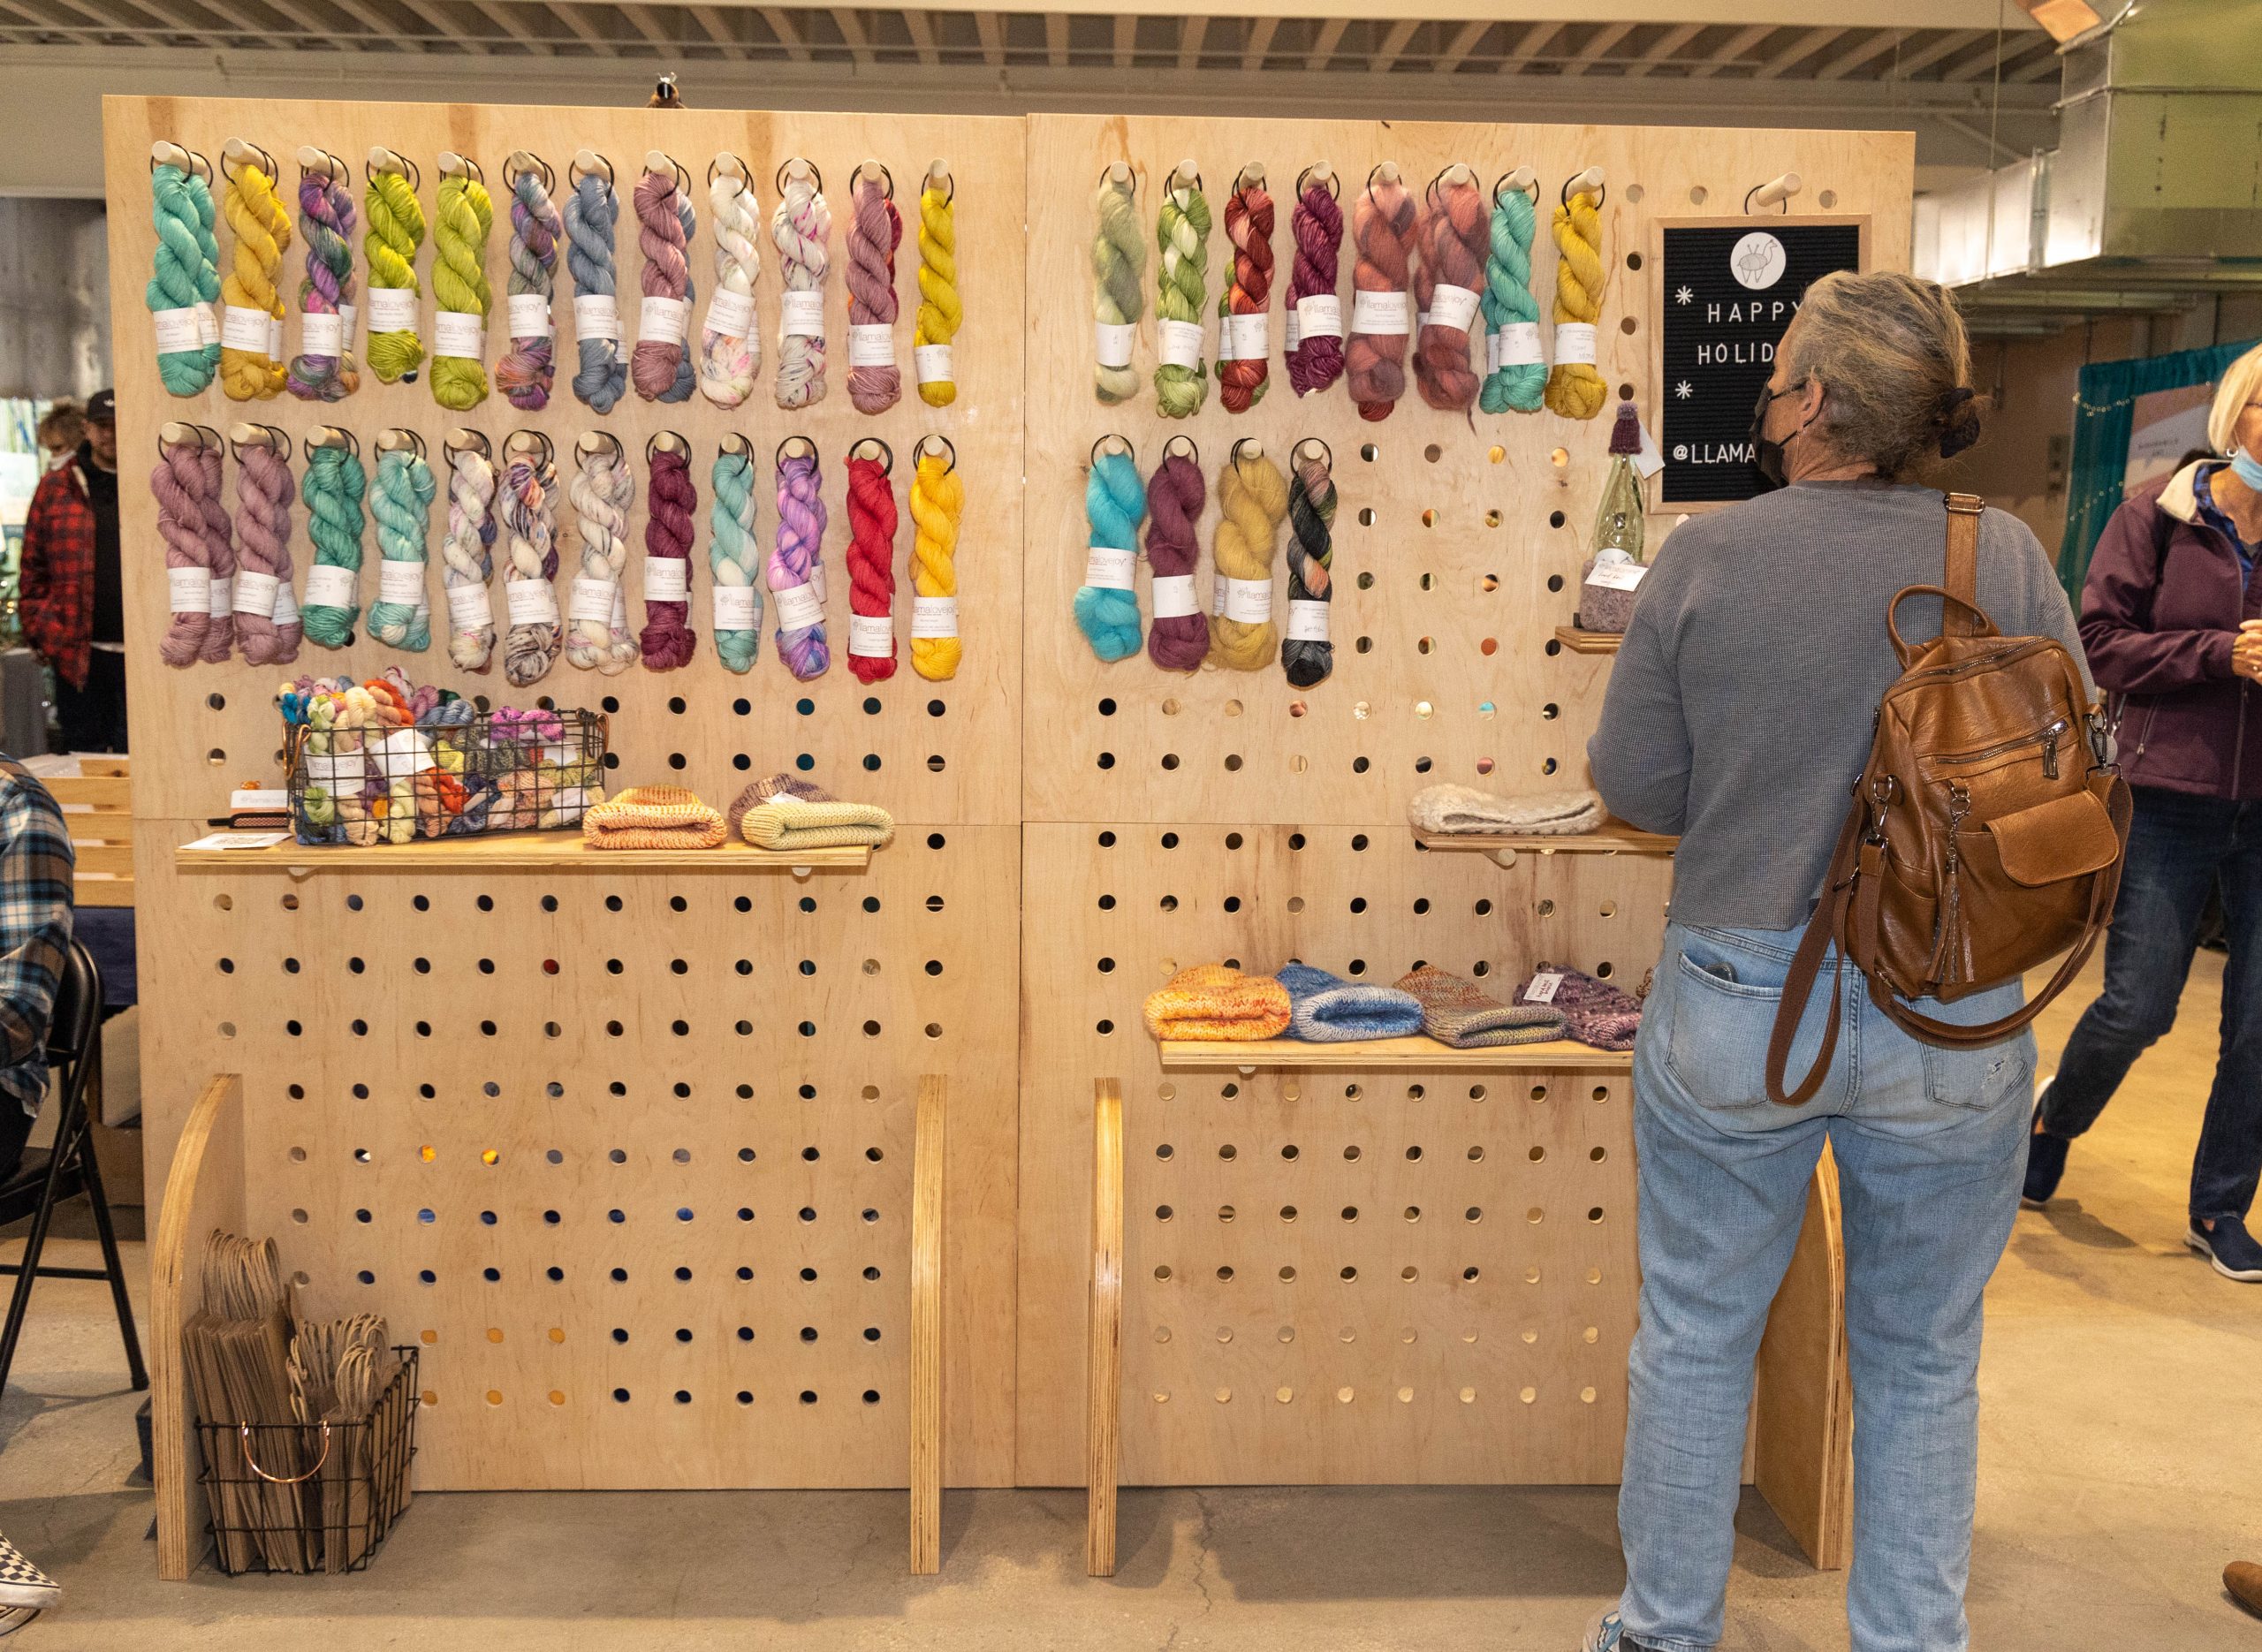
Pegboard is a versatile option for your “back wall” setup! (Pictured: llamalovejoy)

This is an example of a “back wall” leveraged for ample storage space through the installation of shelves. (Pictured: MAEK.Shift)
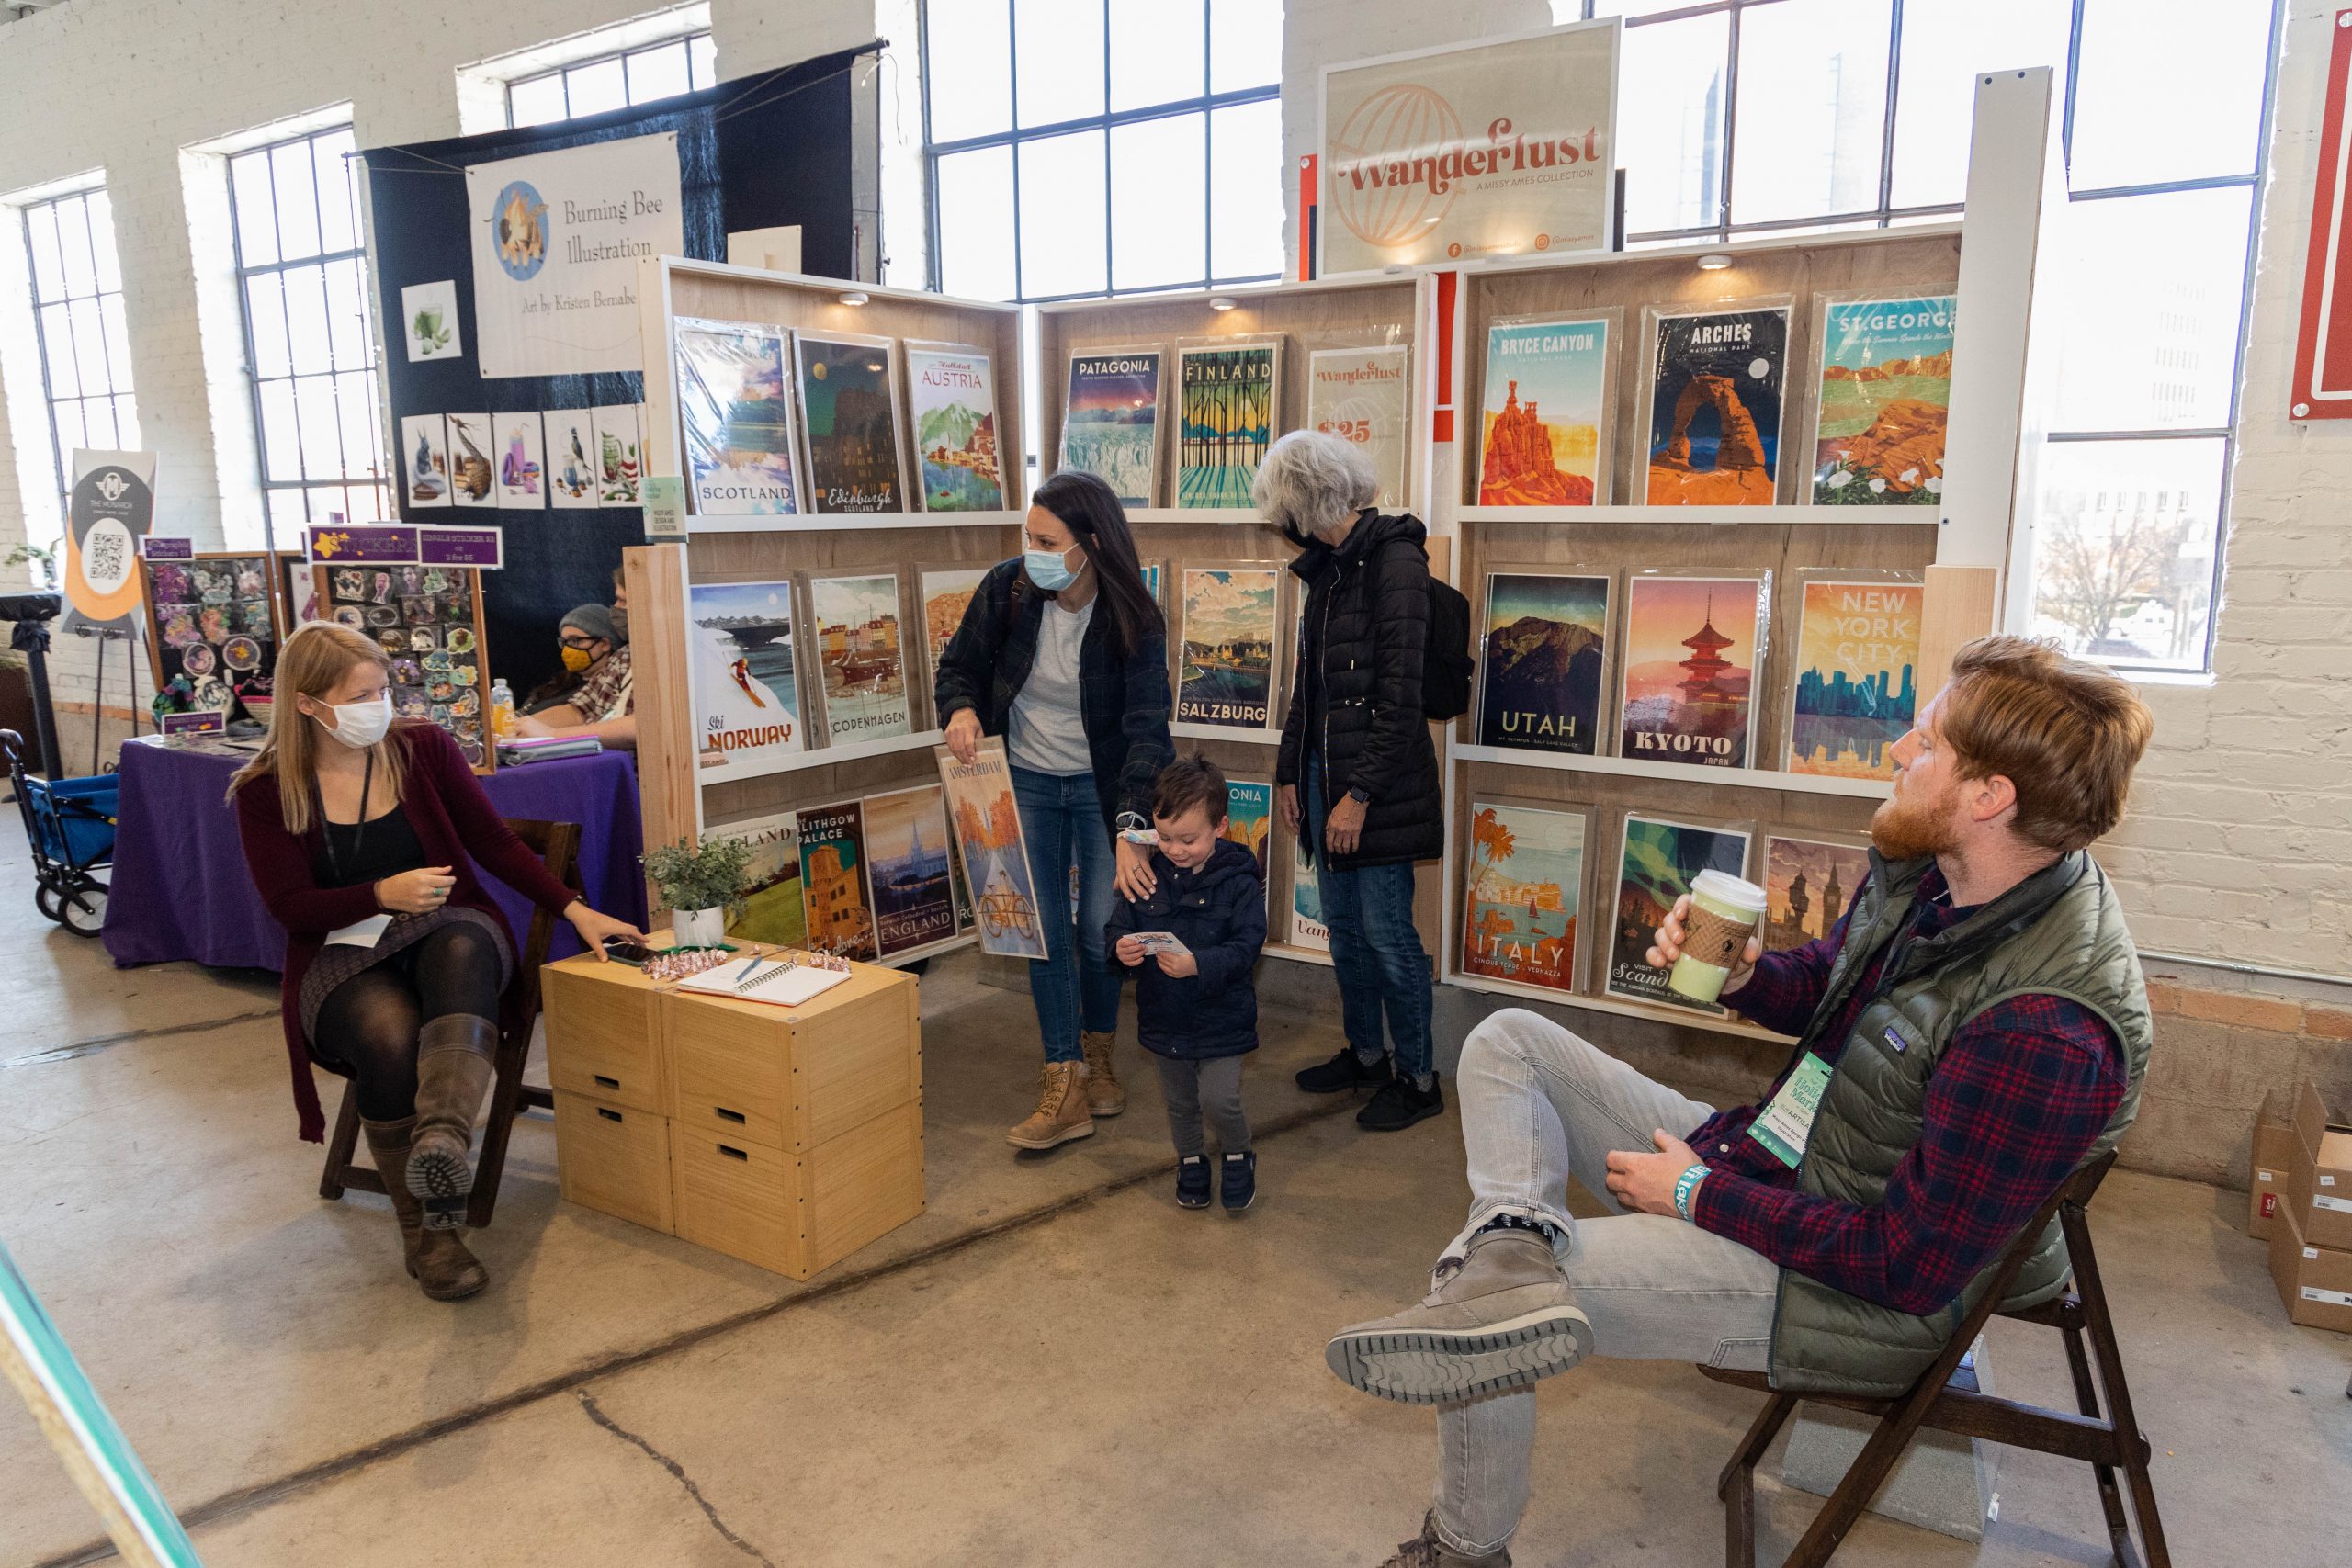
Side walls are an optional addition to accommodate lots of extra display room! (Pictured: Missy Ames Design)
Additional considerations for planning your display space:
- Bring a table and chairs: Unless you rented a table or chairs with your exhibitor payment, you will need to bring your own tables and chairs for your space.
- Think about foot traffic and customer flow: How will customers navigate your space? How can you best accommodate social distancing between you and your customers? Where and how will they pay?
- Include signage with your branding: Make a positive first impression with visually impactful branding in your signage and design. Prominently display your business name in your store space, and consider having your social media handle visible in your signage.
- Practice your setup in advance: Prior to the DIY Festival, it is highly recommended that you practice your full setup at home by taping off your space (10’x10′ or 5’x10′) and setting up your back wall, furniture, display hardware and signage. Take a photo of your setup to keep on your phone and help you expedite your setup on-site!
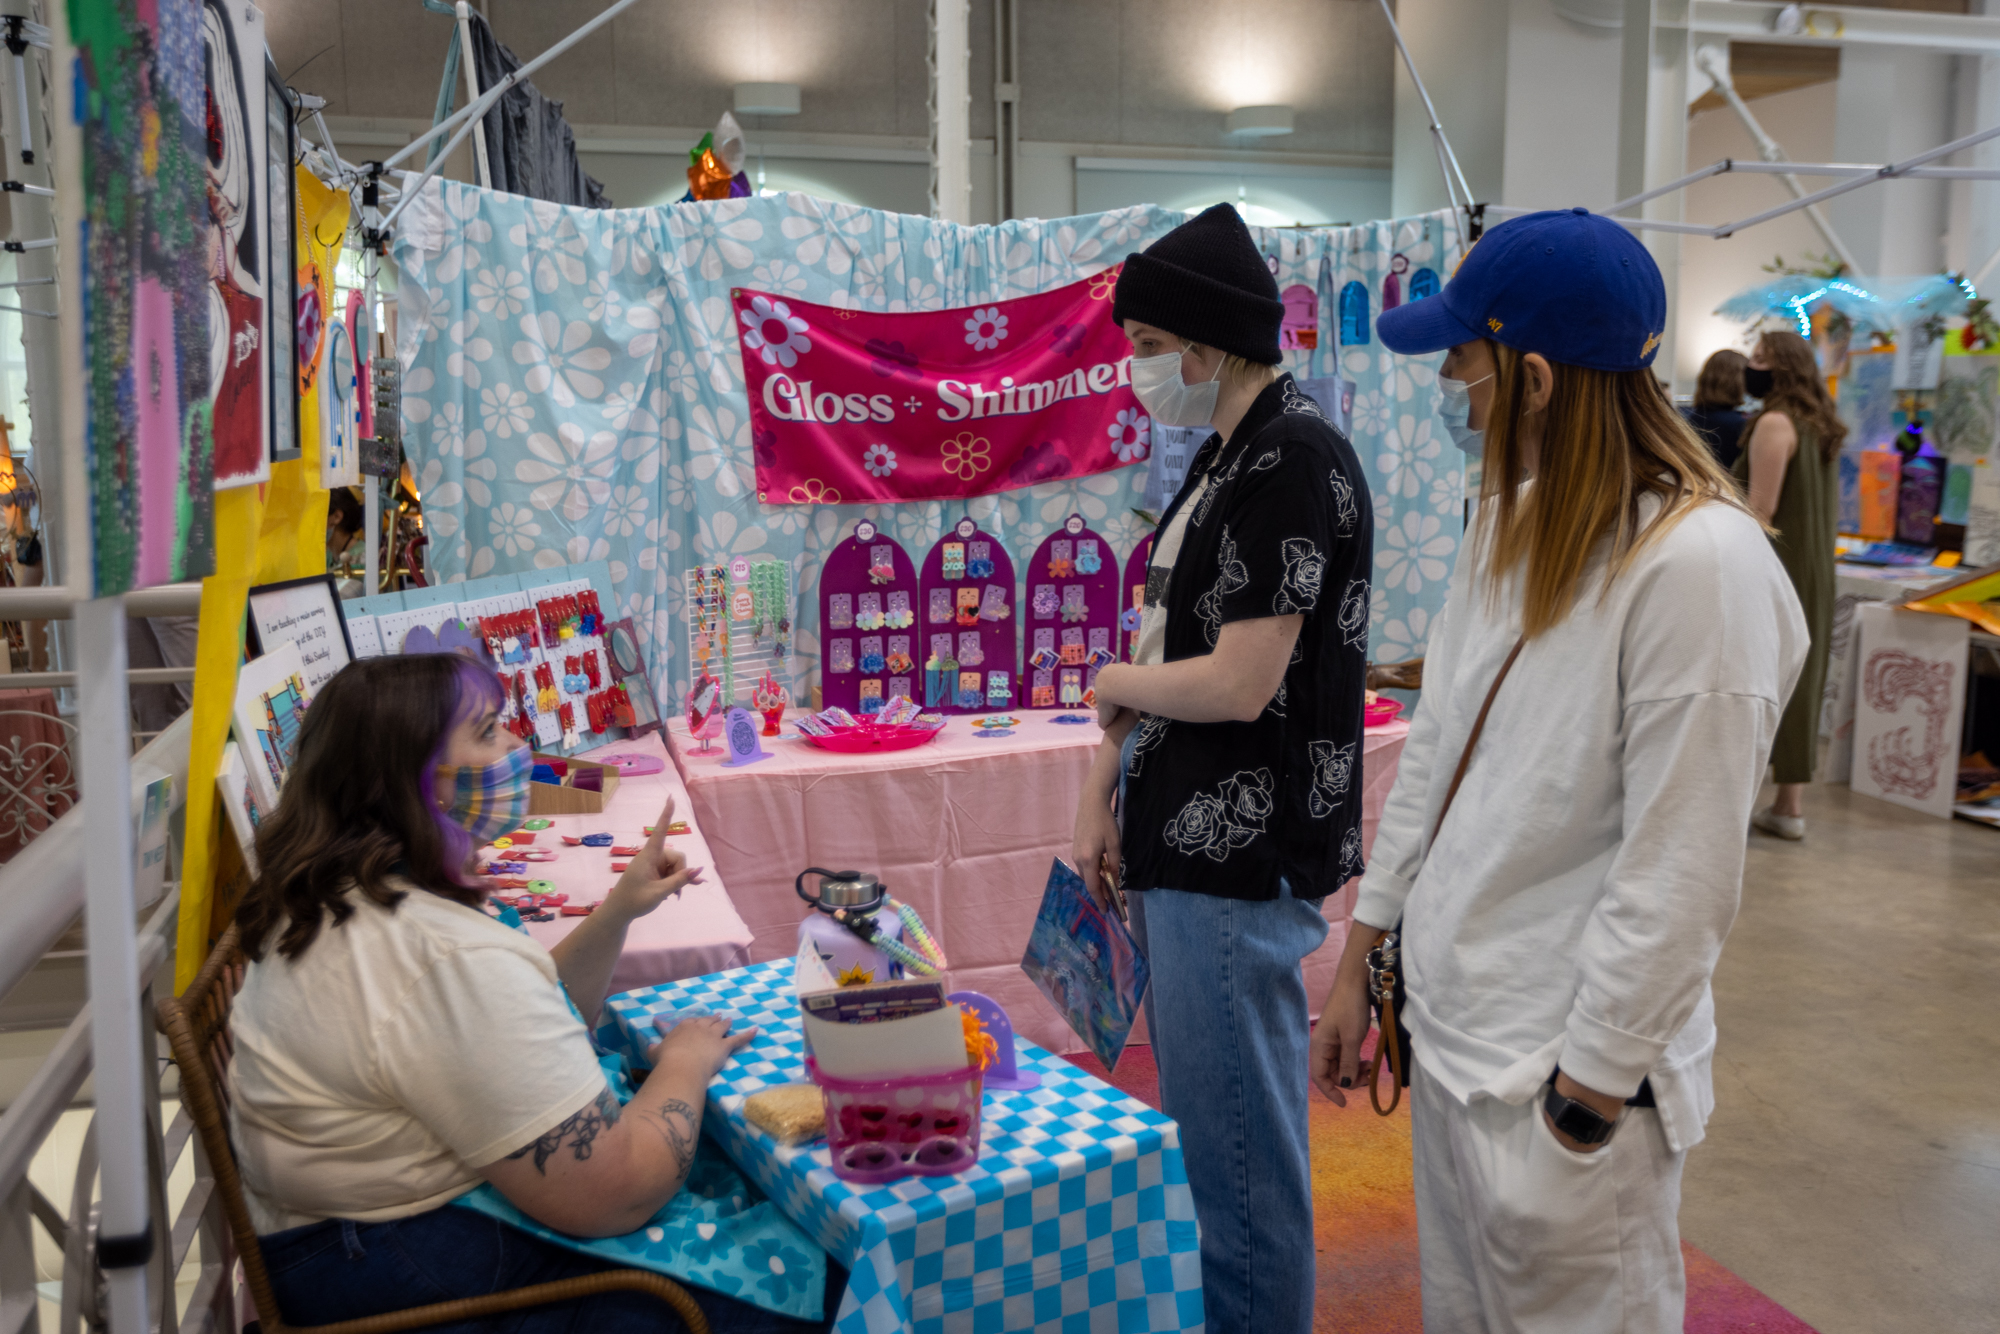
Here is an example of a metal 10’x10′ tent frame (minus the “roof” fabric covering) utilized indoors for the Annual Craft Lake City DIY Festival. The use of a tent frame serves as an easy way to visualize your 10’x10′ space while providing areas for you to clip/hang curtains. (Pictured: Gloss & Shimmer)
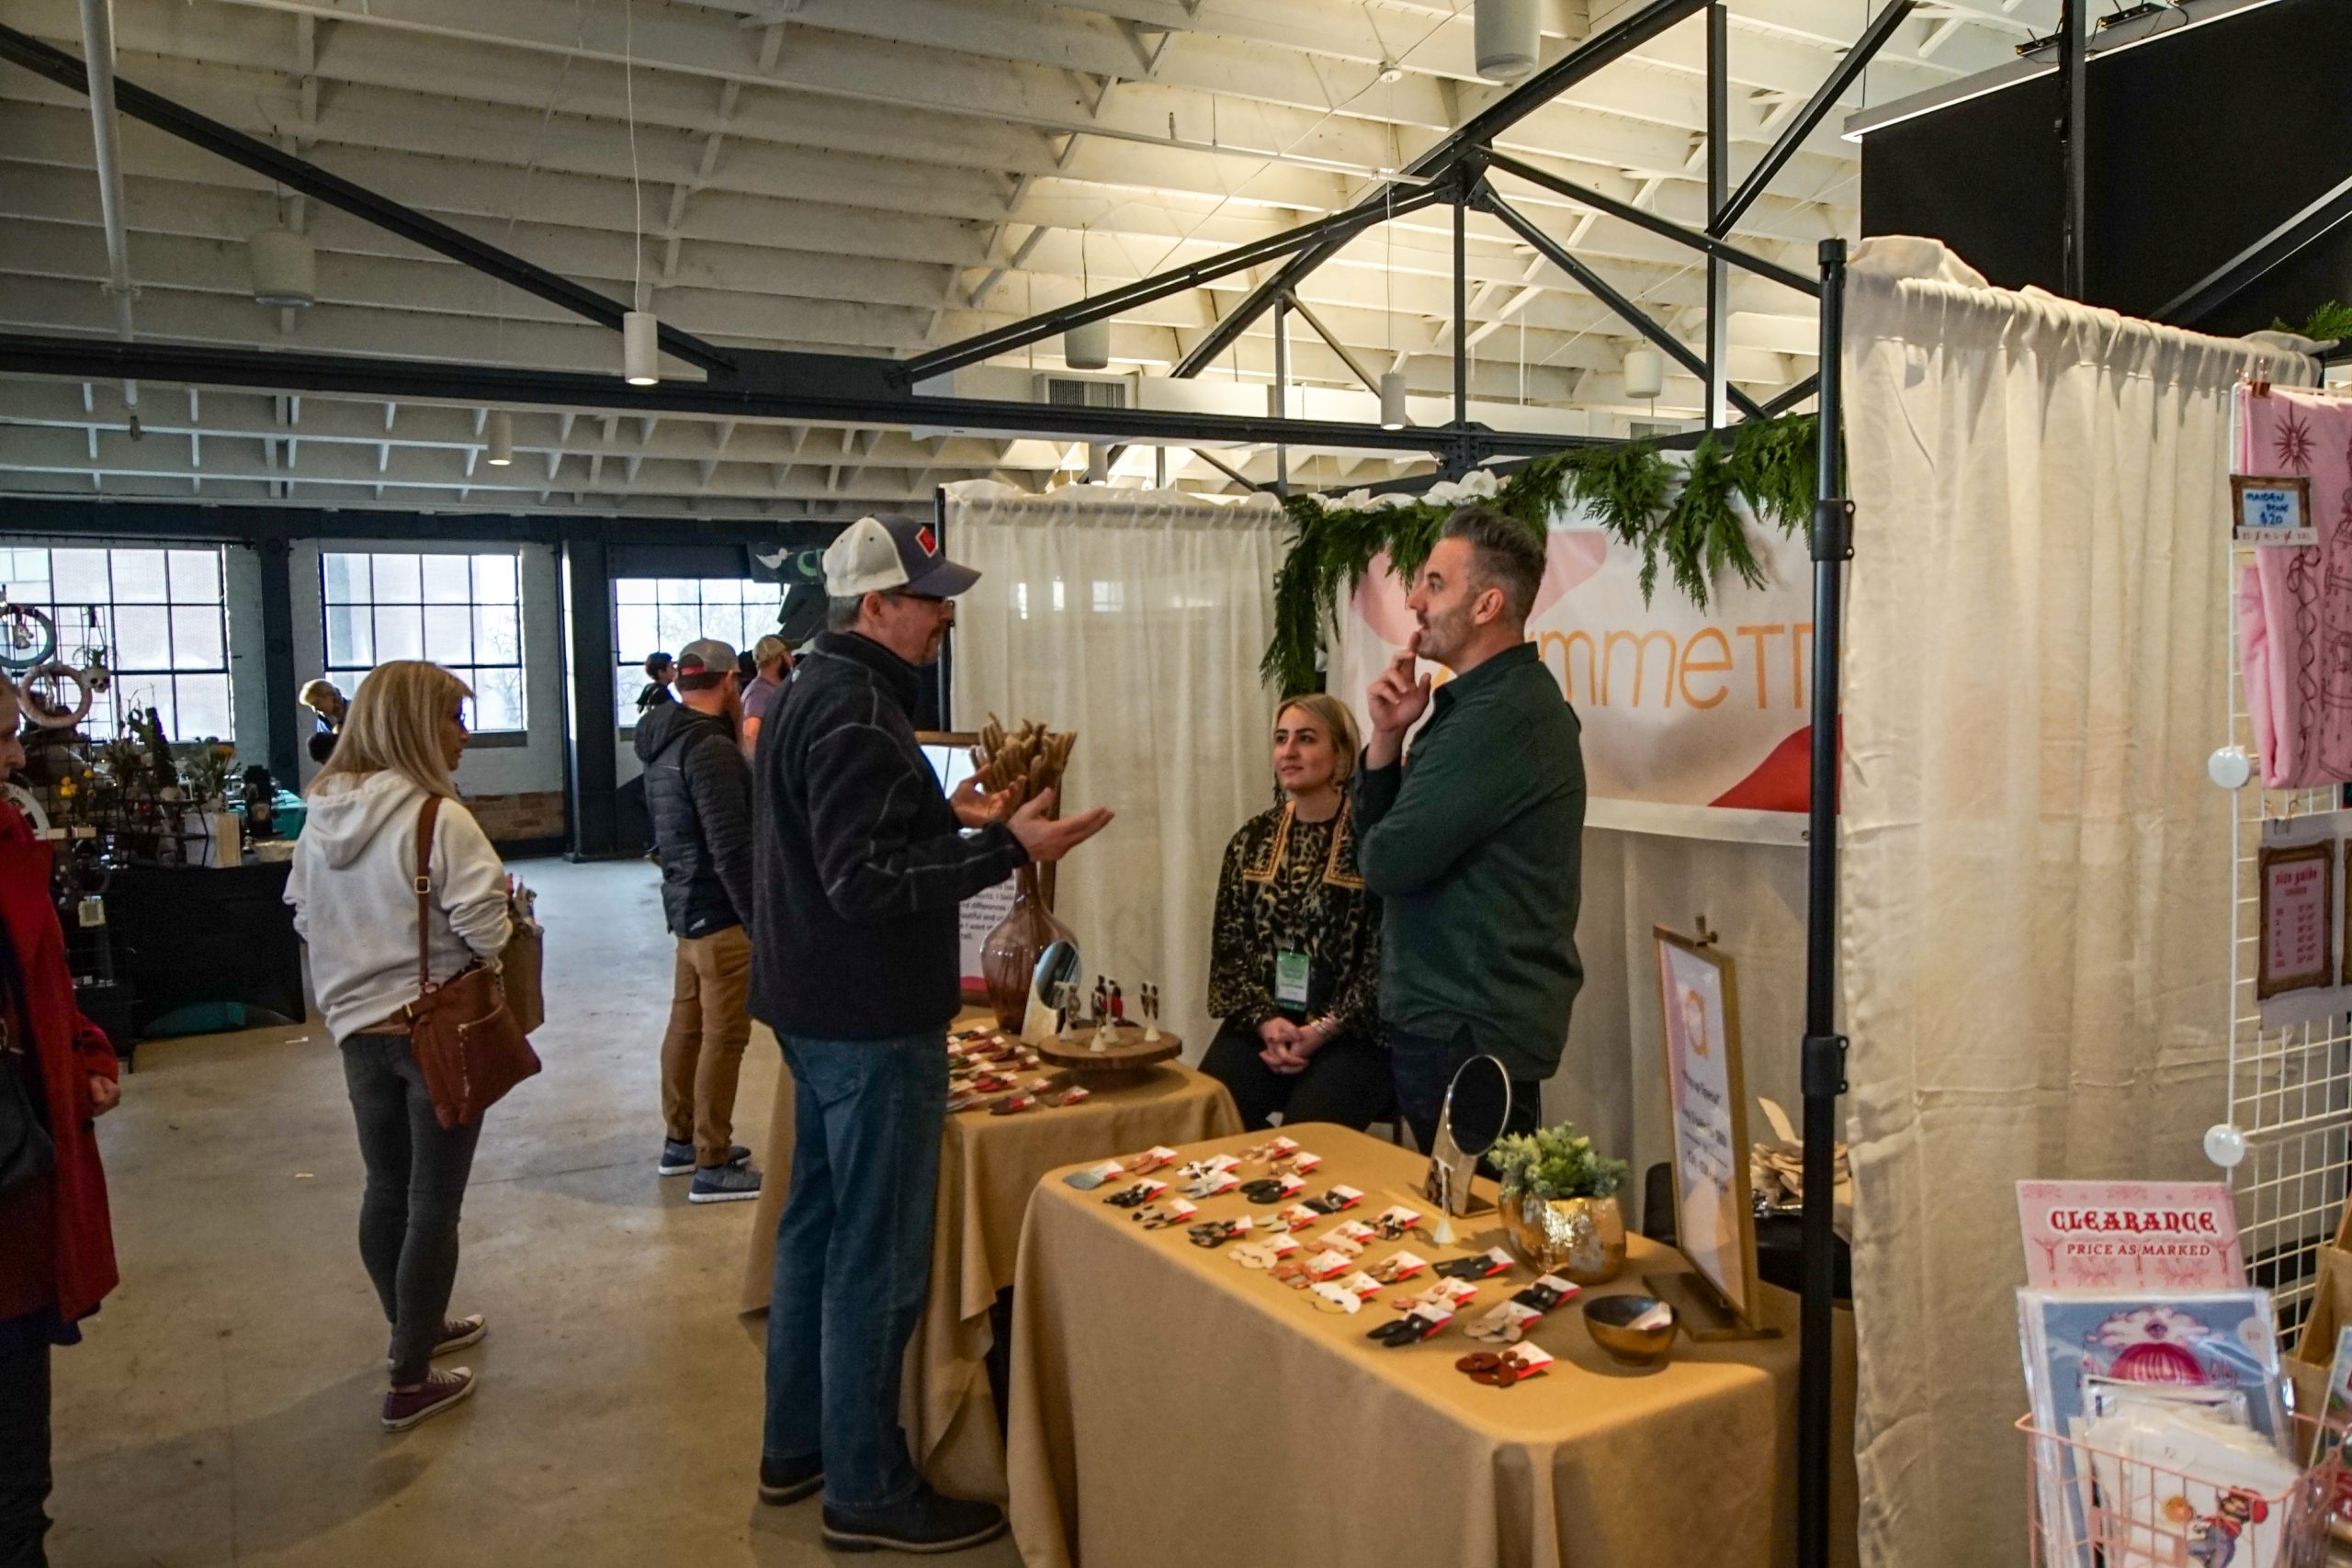
Side walls don’t have to function as extra storage space for your product. They can be helpful in just visually separating you from your neighboring businesses! (Pictured: Aisymmetrical)
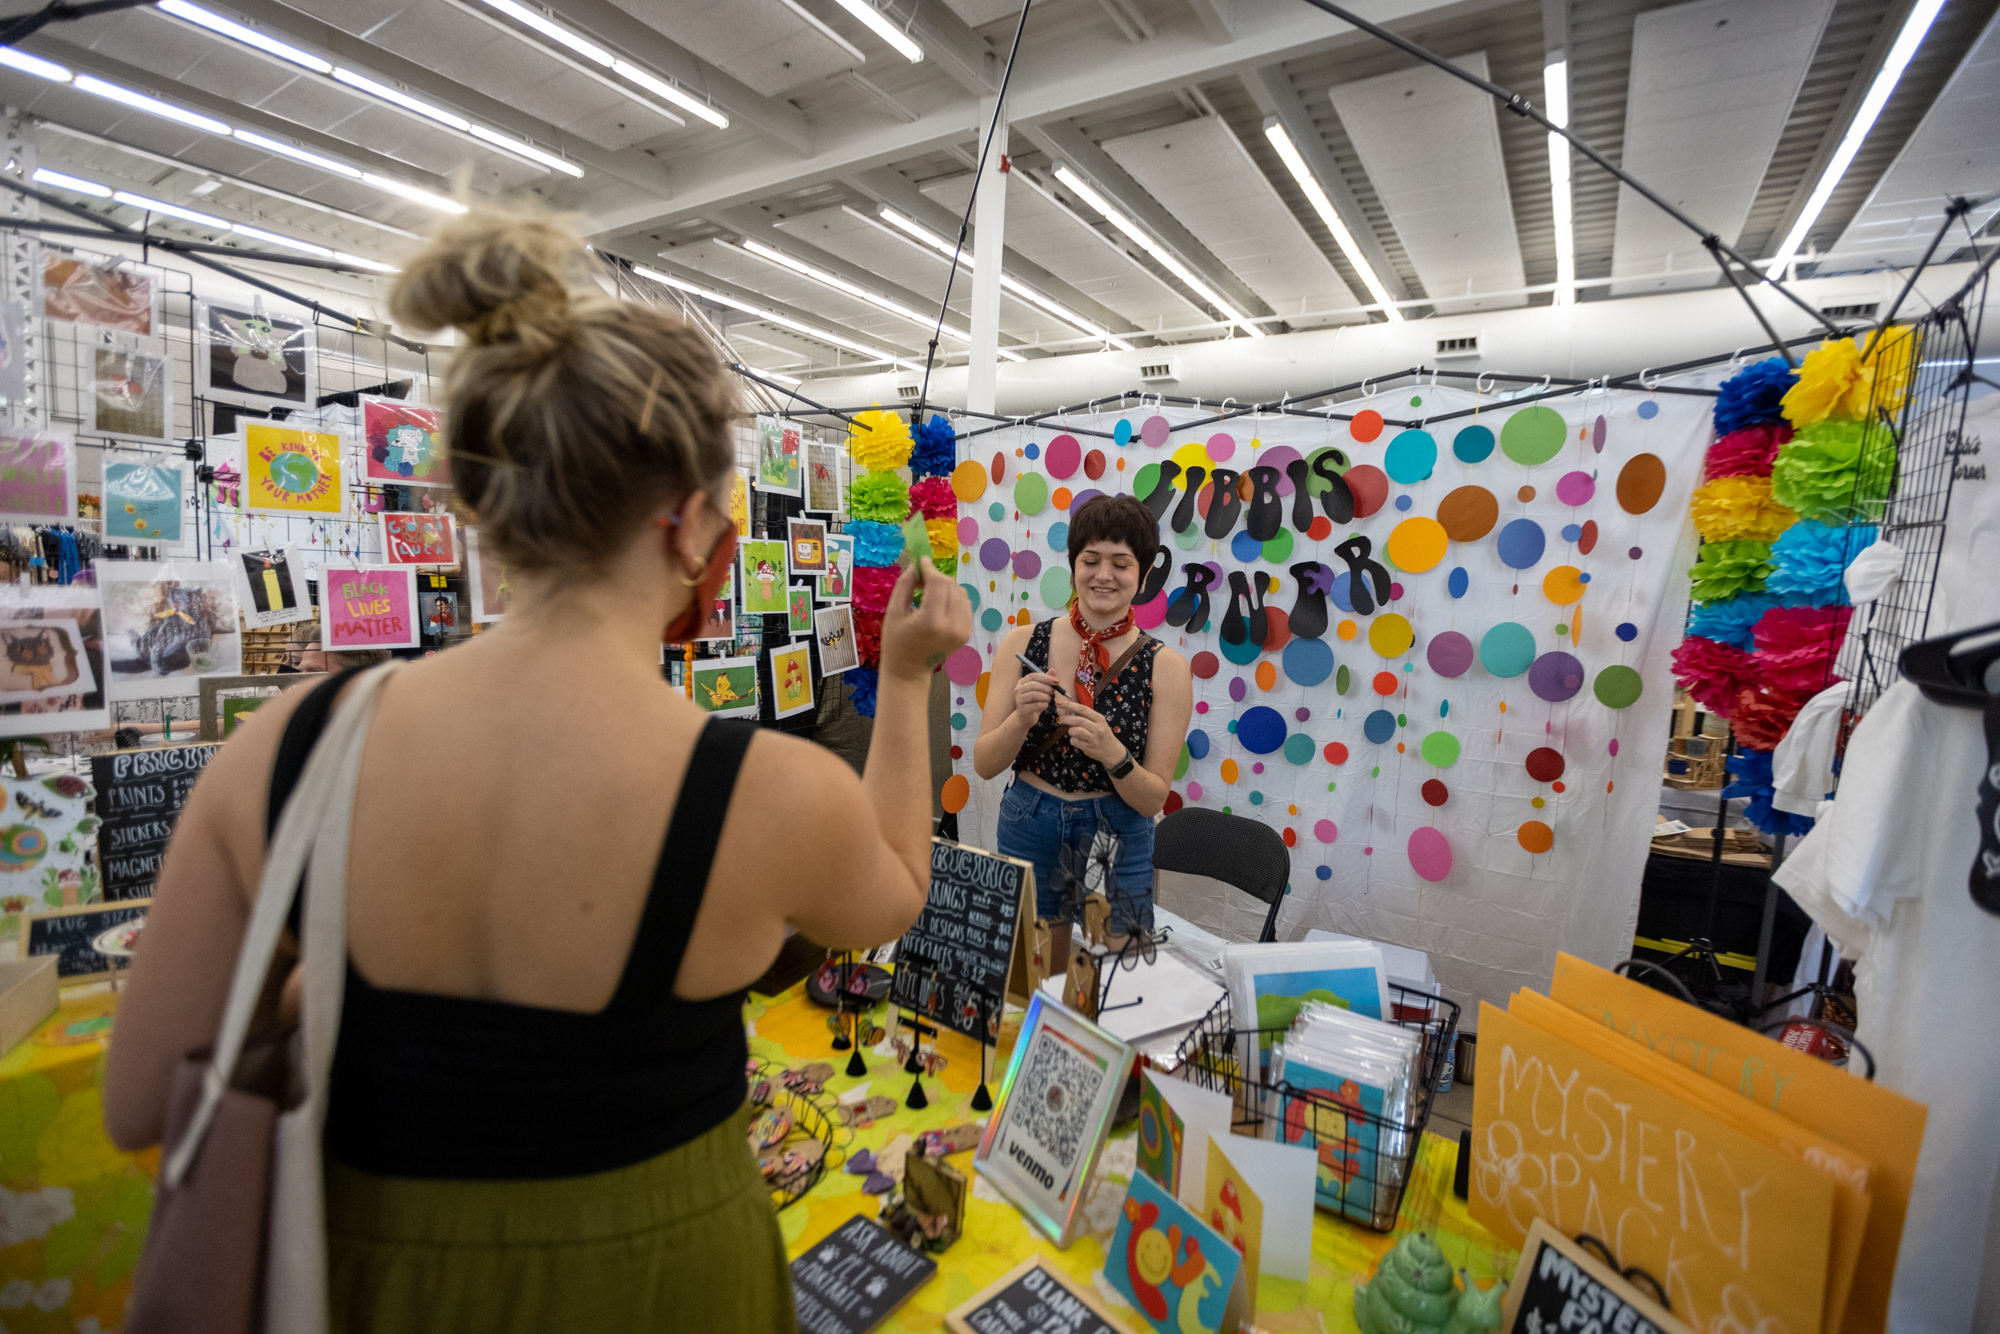
We love this fun and eye-catching signage! Having your brand name displayed prominently on your “back wall” makes your display easy to spot from a distance, while making it simple for festival goers to find/follow you on social media. (Pictured: Libbi’s Corner)
(Pictured: The Art of Scott Tuckfield)
Questions?
If you have any questions, please email artisancoordinator@craftlakecity.com. We look forward to seeing your store space at the DIY Festival!
Note: Exhibitors are responsible for ensuring that all furniture, walls, tables, products and other materials have been properly and safely set up. Craft Lake City is not responsible for any damaged merchandise or personal belongings as a result of poorly secured items. The above photos are past examples of exhibitor display setups, and are solely meant to help prospective exhibitors get a sense of the different materials & structures they can utilize in constructing their setup.